


Susan Ogier jumps down the rabbit hole and discovers new adventures in art and design...
When I was a young girl my mother gave me a copy of Lewis Carroll’s Alice’s Adventures in Wonderland, illustrated by John Tenniel. Inside she wrote “All the best quotes come from Alice”. Annoyingly, my mother was right – as usual - and I often think about that little note whenever I use a reference, visual or verbal, from this well-loved story.
There are so many excellent children’s books to choose from nowadays, not to mention plenty of modern and beautifully illustrated versions of Alice. However, there remains something very special about the original story that reminds us of the power and potential of a child’s imagination.
“What is the use of a book without pictures?”
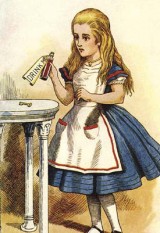
 Alice’s adventures begin while she reads a book in the summer sunshine. Why not start your children’s experience in the same way by taking a trip to the local park? They’ll need to bring reading books, sketching materials and some digital cameras.
Working in pairs, the children should photograph each other reading their books. What is the most/least comfortable position to be in whilst reading? Ask them to write about their experience of reading in the outdoors. Is it easy and relaxing, or is it more difficult to concentrate, as Alice seemed to find?
When you are back in the classroom, scan some of the children’s sketches and display them on the whiteboard. Alternatively you can print out pupils’ photographs. Translate these into three dimensions by creating little clay models of the children reading.
Children should start by rolling out a flat piece of clay, or ‘slab’, and then build a reclining figure onto this base. Demonstrate some very simple modelling techniques such as pinching, coiling and joining clay together using ‘slip’.
Let the children experiment with clay before making their figures: they might use everyday implements such as forks, or try pushing soft clay through a garlic press to create ‘hair’ or a grassy texture for their sculptures.
“After a fall such as this, I shall think nothing of tumbling downstairs!”
 What would it be like to fall down that rabbit hole? Have the children ever felt as though they were literally falling when drifting off to sleep?
Ask the class to work on large sheets of paper and draw with thick pieces of charcoal or black marker pens. Encourage them to make a mark on the paper as you tell a story about a ‘line’ that falls down a deep, dark hole. The children must interpret the story by drawing in response to what happens to the line.
You might suggest that the fall is fast and then slows to a crawl. The line might bang against the sides of the hole, splintering into small pieces; or it could float down gently. What will eventually be at the bottom? Perhaps there is a vast sea and the line is being knocked by huge waves?
At the end of this activity, the children should have discovered a wide range of interesting marks that will add to their repertoire of visual language for use in other drawing and painting projects.
“Oh, I’ve had such a curious dream!”
 Was Wonderland all just a dream? Investigate the strange and magical world of dreams with the children. Do they remember their dreams? What sorts of things can they remember? You might have a few day-dreamers in your class!
Look at the work of surrealist artists to find out how they were influenced by dreams and the subconscious. See how they represented some of these memories and images by combining unusual and unrelated objects together in their paintings, sculptures and photography.
The surrealists have helped us to look at the world in new and extraordinary ways. You might try an art project that allows your children to do the same by looking at artists such as Rene Magritte or Georges de Chirico.
Ask the class to bring all sorts of random objects to school and place them into a large bin liner. Children might work in groups of four and take it in turns to take a ‘lucky dip’ into the bag.
The children in each group can discuss and sketch ways to make unconventional connections between the objects, before either drawing or creating a photographic piece that communicates their group’s ideas.
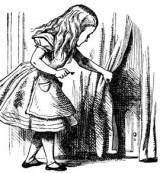
“Sorry, you’re much too big. simply impassible.”
 This activity links with maths and gives the class a chance to explore shape and size in creative ways.
Poor Alice didn’t know from one minute to the next what size she would be. What do the children think it would feel like to be squashed into the rabbit’s house? Can they imagine not being able to see their feet because they are too far away?
You can enter a world where everything is wildly out of proportion by looking at the work of a contemporary artist, such as Giancarlo Neri. He created a giant table and chair sculpture for London’s Hampstead Heath to symbolise the loneliness acquainted with being a writer (type ‘Giancarlo Neri’ into Google Images).
Use this image as a starting point for making larger than life sculptures – ‘furniture’ or ‘household objects’ could both be suitable themes. Use large boxes, tubes and masking tape to create a structure and add cut cardboard shapes for details. Cover the whole construction in paper maché and paint when dry. Exhibit the pieces together in a communal space in your school, such as the hall, and ask other classes to visit your installation. How does it make them feel to be dwarfed by the large pieces?
”...A grin without a cat! it’s the most curious thing i ever saw in my life!”
 The Cheshire Cat has to be one of the most famous felines in English literature. Try using this incredible creature as a starting point for discussions on friendship and helping others. Do the children think that this cat was actually very helpful to Alice? How does it make you feel when someone smiles at you?
The children might share their thoughts on this by making a ‘smiling tree’. Ask them to draw a large smile onto thin card by observing one another’s facial expressions. The children should cut these out and laminate them before attaching a piece of string or a ribbon. Hang the smiles to a tree within the school grounds or in a location that needs ‘cheering up’ and watch for the reactions of passers by!


Power Maths – A Child-Centred, ‘Can-Do’ Mastery Teaching Programme for KS1 and KS2
Category: Maths

Fit To Dance Schools From Disney On Ice
Category: Other

‘S!ng Sensational’ And ‘A King Is Born’ – Two Fun New Musical Masterpieces That Children Will Love
Category: Music

Product review: Schofield & Sims Fractions, Decimals & Percentages
Category: Maths

Teaching five year olds to talk
Ace-Classroom-Support

Why Boarding School Fiction Feels Comfortably Familiar
Ace-Classroom-Support

Join the tribe with a stone age forest school
Ace-Classroom-Support


